This year, I have been on the road so many times that I have not had a lot of time to design new quilts, much less finish quilts that were started quite a while ago. I never thought that I'd be saying "thank you" to June's Tropical Storm Bill - the storm regrettably forced me to cancel a trip up to Ft. Worth and Denton, Texas due to the flooding and heavy thunderstorms that made travel unsafe. My thanks was only expressed in that I got an all-too-brief respite wherein I could actually stay in my sewing room and work (ahem: play!). This month's post will show you some of the things that I've been working on... and some of the things that I've actually gotten to finish in the past couple of weeks. I have truly enjoyed the time to do some real quilting.
So let's get started. First of all, I think I showed you my Simply Baltimore and Baltimore Squared in various stages of assembly, but I'm not sure that I ever showed you the finished -- quilted and bound - quilts. For starters, here's Simply Baltimore. I made this quilt because I felt like there was not a good "easy" or "beginner" Baltimore design on the market. I wanted something that everyone, of all skill levels, could tackle without being completely overwhelmed. In this quilt, there are nine blocks set on point. And they are fairly simple blocks without a lot of heavy overlays of applique pieces - and very few fabrics... just a few reds and greens and an occasional gold.

All of the sashing and border strips are done with paper foundations. Some people hate using foundations, but I love them; they are fast, precision-pieced, absolutely accurate units when done with paper foundations. The secret is to use a VERY small stitch -- most people are astonished by the small size of my stitches - 22 to 25 stitches per inch (fewer if you use a large size 90/14 needle). The stitches are about the size of the period at the end of this sentence. The paper flies off the sewn units!

This quilt also used "empty" or "alternate" blocks - that is, blocks without piecing or applique in them. I like alternate blocks for several reasons: it allows me to quilt soft, relaxing designs in the open area; it means I don't have to do more piecing or applique; and it gives the quilt an overall airy look. In this quilt, I used a double feathered wreath with cross-hatching in the background in the empty blocks.

See how simple these blocks are to make? I did cross-hatching in the background of each appliqued block - and used the 1- by 2-inch flying geese units as my "marker" for where those cross-hatch lines started and stopped on the diagonal. Most of these blocks were based on vintage Baltimore or red-and-green quilt blocks that I have spotted through the years. I just added little touches - like the bird in the block below.

The next quilt is my brand new Baltimore Squared quilt. I have posted the pattern on my website for purchase (www.comequilt.com). It has the same blocks in it as the ones in Simply Baltimore except they are not set on point. In some cases, the blocks are the same, but in others - such as the harp block above, I had to redesign the block to make it fit the same 15-inch finished size. As you can see, I chose not to use the same flying geese sashing or open/alternate blocks in this quilt. I decided I wanted to achieve the same open and airy look by using 4-inch wide "empty" sashing strips, along with a lacy-looking ruffled swag border. I love how it turned out!

Here is the same harp block - modified for a straight-set layout; compare it to the on-point block above and you can see how they are the same - but different!

And here are close-ups of the rest of the blocks in this quilt. I love how easily I could stitch them up. I don't know that I'll ever tire of making red and green quilts.


Here, you can get a better look at the sashing strips - I think they add movement to the quilt through the use of the meandering feather vine, but still remain "quiet" within the face of the quilt.

And here is a close-up of the Lemoyne star cornerstones. Originally, I designed these with half-diamonds - that is, each diamond was half red and half-green. It was overkill and made the center of the star very, very bulky. I regrouped and made simpler Lemoyne stars and love how they are almost like sparkly snowflakes dancing across the quilt. It lends it self again to a very lacy, open look.

Lest you think I'm done making Baltimore album quilts, I'm not! Far from it. This week, I finished the ninth block of a new, on-point "complex" Baltimore quilt that will be called Baltimore Glory. I call these complex blocks because most of the blocks are heavily layered with applique. I already have the layout for these blocks done - now I just need to finish making the units. But in the interim, you get a peak of all nine of the blocks. Woo hoo!
In most of my blocks, I start with a notion of what I want the block to be: a woven basket, a ship with a wreath, etc. And then I start designing the layout of the applique units. I like to put at least something in each block that is unique. In the block below, I added two blue and yellow flowers that are made by folding a circle into a hexagon - with no raw edges showing on the top or bottom. It is really kind of a cool way to quickly do the prep work on these flowers!

The cherry wreath block below doesn't really have any unique flowers in it - but each of those cherries is stuffed and they will look like trapunto cherries by the time I get the quilt quilted.

In the cornucopia block below, I added five "seed pods" - and made the three corner rose buds have two different fabrics (red and gold). I saw that in an antique quilt and thought it was quite unique.

And what Baltimore album quilt would be complete if it did not include an eagle?! This particular block was actually based on a mid-century recruitment poster for soldiers back in the 1860s.

The rose and daisy block below includes a swag of beads across the vase - I love how that added a bit of "glory" to the block.

In this block, I used a set of three stems, which I braided together, to make the top of the basket.

The harp block below has nothing unique when it comes to applique, but I did fussy-cut each leaf so that it contained the same motif in it. I love this wreath -- it is just "rich" with berries!

I don't think I've ever made a three-bow ribbon before, but they were often found in old album quilts and help historians in dating certain blocks.

And an album block is a "necessity" in my mind, in a complex Baltimore album quilt. This one includes blue folded flowers in the bouquet.
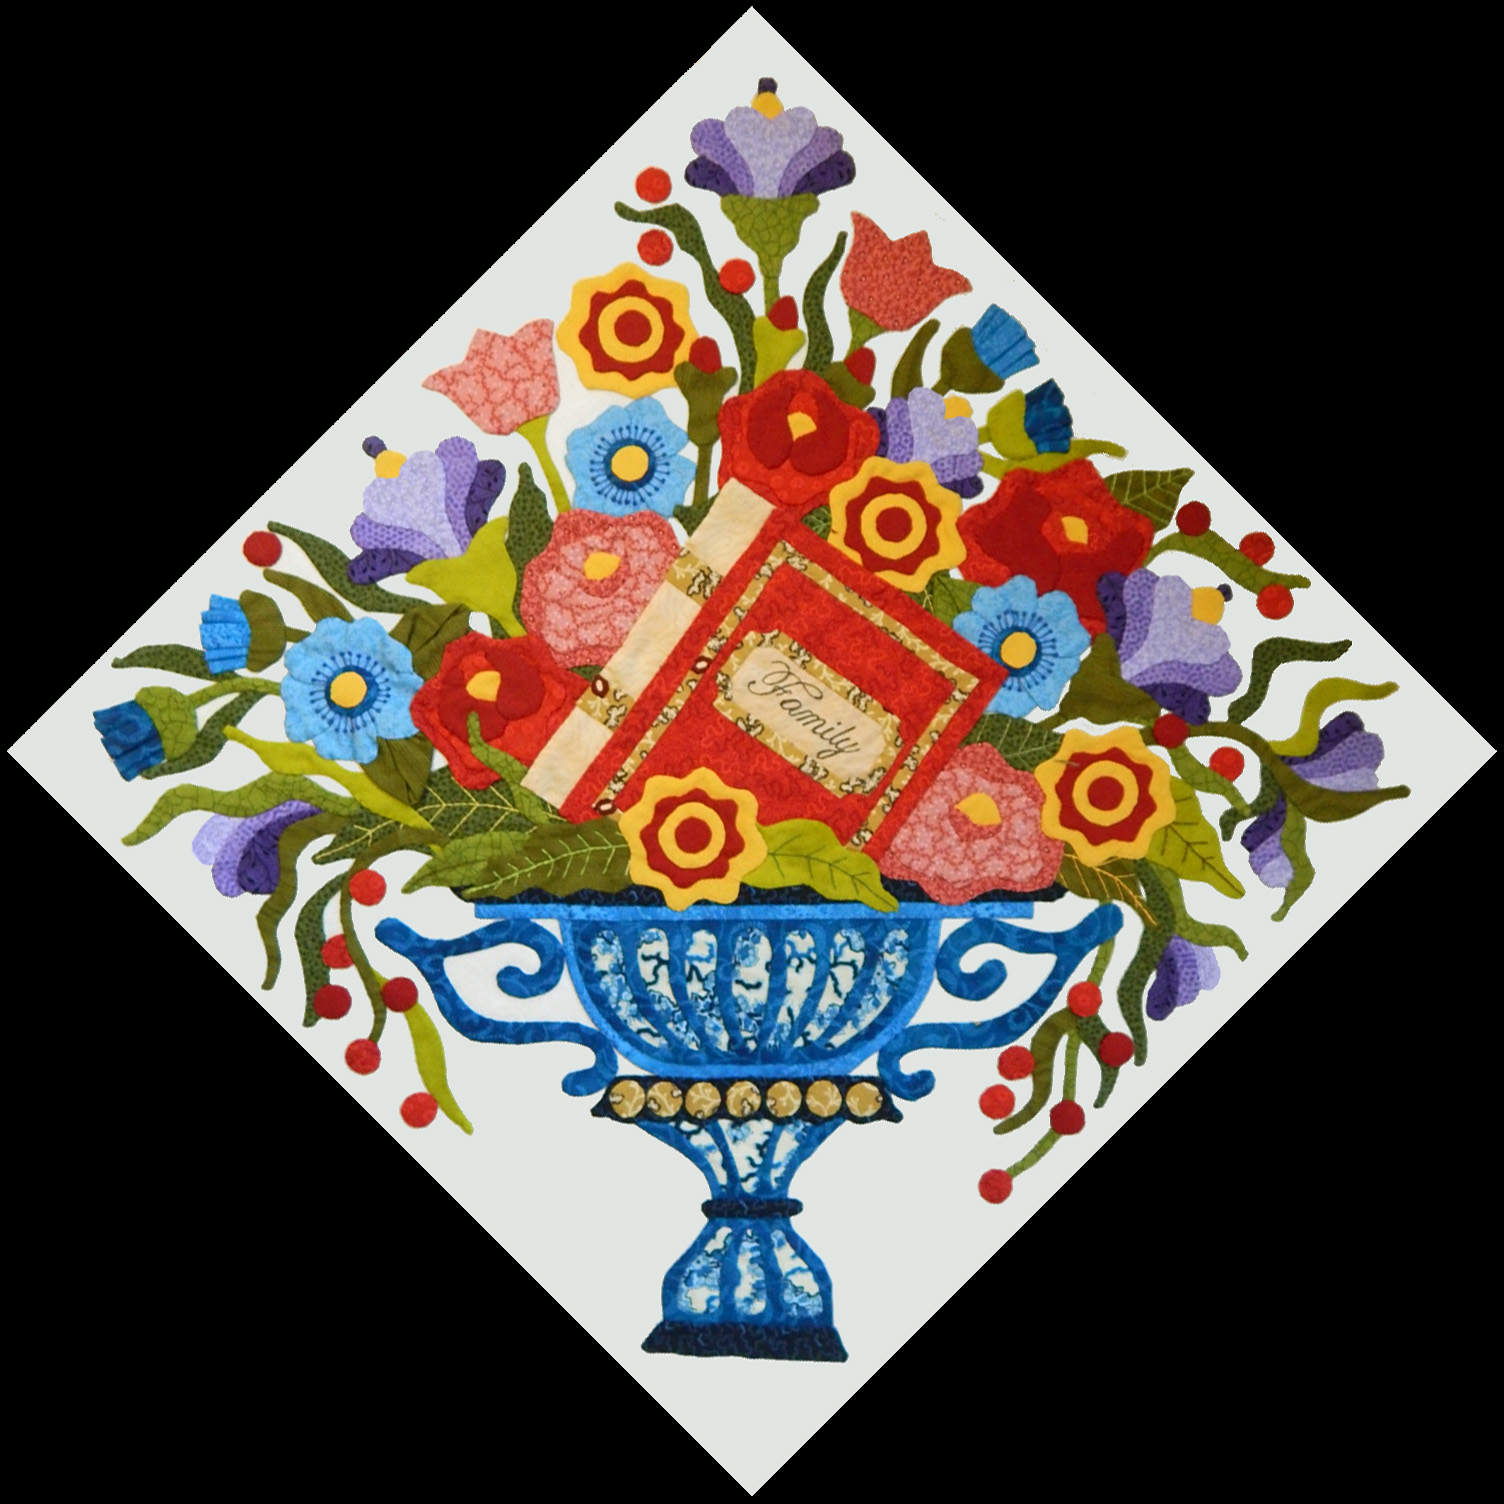
I am working on assembling the quilt this week and hope to finish it over the coming weekend. Once I put the final touches on the pattern (I've changed the sashing and border design several times!), I'll put the new Baltimore Glory pattern on www.comequilt.com -- hopefully that will happen within the next month - though I may decide to wait until I also finish quilting the quilt before I do the cover photos for the pattern. My goal is to have the quilt completely finished before I head up to Omaha for my Baltimore on the Prairie workshops in September.
So what else have I been working on? I started a reproduction of the quilt below, a while back. This quilt was made by Addie Heipler Allen in 1917 and it measured 90 by 78 inches. I first saw a picture of this quilt back in 1991... and fell in love with it. I've followed it around at various points - and saw that it was sold at an auction in 2010 for $5,382.

I finally found the time to sit down and start to "remake" this old quilt for myself late last year... but it took me quite a while to finish it due to the interruptions of travel. It is now done! Ordinarily I would lay the quilt out on the floor, photograph it, edit the photo using Photoshop, and then post it here. When I had this quilt downstairs to be photographed, the sun shining through the stained glass windows of my entryway discolored it with prismatic spots... so I ended up just putting the quilt across the grand piano for your viewing pleasure. Beside it, on the piano bench, is a jar of porcelain "letter balls" that were used in Victorian times to teach children their alphabet.

Here is the best shot of the quilt that I could get on my entry room floor - so you can at least see the layout. The quilt is paper pieced - and I promise, the foundation piecing is easy with simple flip-and-sew piecing. I love this quilt! I am working on writing up the pattern on this one, too... and should have it on my website next month. It is called Addie's Alphabet.

You saw in the Baltimore Squared quilt above, where I used Lemoyne Star blocks in the sashing - and I mentioned that I did not use split diamonds in that quilt. Because the blocks in this quilt were considerably larger, I was able to make these blocks using split (two-color) diamonds without having as much bulk in the middle -- because I could trim a lot of it away and then put a circle on top of the center. It's a simple way to hide any assembly ills.

Here is a close-up of the blocks... again, each is paper-pieced with a flip-and-sew method.

As I was making the quilt, I came across several different fabrics that were perfect for the backing of the quilt. I chose three different fabrics; you can see two here. The third one is like the one on the bottom, but has a red background instead of black. Finding "perfect fabrics" is so much fun!

So what else have I been working on? My daughter and my grand daughter and I now claim finished quilts, so let me show those to you now.
The quilt below, Daisy's Cowgirls, was designed by my 8-year old grand daughter, Daisy. She is always happy to come sew with me and to choose what she's making next. She has mastered pillow-making without my help, but needs a little more help with quilts. On this quilt, I bought the blocks on eBay (aren't they darling?!) and Daisy immediately grabbed them for her own use. Her folks own a ranch, so why not a cowgirl quilt?

Each little cowgirl was appliqued with a blanket stitch. Sometimes simple options are the best choice!

Daisy stitched a few of the sashing strips in place and left he rest for me to do - right after she begged me to take her to JoAnn's so that she could choose a backing. She chose a soft Minkee fabric... which is always a challenge. The quilting was easy, but the clean-up of all those furry threads is a mess! Daisy is the only 8-year old I know that is proud of now having finished four quilts... and having three UFOs. She's taking after me already!

My daughter, Jenny, comes over on Tuesday nights and we get to spend the evening sewing. Sometimes we work on the same thing and sometimes we work on different things. We started making a bunch of paper-pieced blocks last year... and stitched and stitched and stitched... thinking that we'd each need about 100 blocks. Then we put our heads together and made a wise decision. I put together a layout in Electric Quilt that required only 48 blocks. Suddenly, we could stop piecing blocks and we were ready to assemble our quilts! Below is Jenny's quilt. She chose to set the blocks with alternate empty blocks -- which is how we saved ourselves from making so many extra blocks.

She used a brown print border - and a deep pinkish backing.

She asked me to quilt feathered wreaths in the open blocks - and to stitch in the ditch around the pieced block units.

These were pretty simple blocks to make; I made paper foundations for them, and we pieced the blocks by making them out of three individual strips. I love easy-breezy piecing like this. And there was a bonus: the blocks were great scrap-eaters.

I added a meandering feathered vine in the border to complete the feathered look to the quilt.

Here's another picture of the border, showing the corner. I love how meandering feathered vines travel quietly around the outside of a quilt.

And then, there was my set of blocks and my quilt that I needed to finish. I assembled the blocks in much the same way; here is my quilt, loaded on my longarm...

I decided that I wanted a bit different look to mine, though, so I used a darker background for the alternate blocks and added a little one-inch floater within my border before I started quilting it.

I honestly thought I would get really tired of quilting feathered wreaths, but they are fast and easy to make. In addition, the blocks were very easy to quilt - I could start at one end of the quilt and in a single pass, I could quilt an entire line of blocks with no starts or stops. That was an amazing discovery! Also, I did something a bit different in a few of my blocks - the center one, below, has a half-square triangle in the center of the block. Others had four-patches or square-in-squares in the center.

I also decided that I wanted to try quilting something different in my border. I dug through my box of quilt templates and found this one... and decided it was the one I wanted to use. So much of what I enjoy about quilt making involves being able to experiment and play with color, shape, style, etc. I feel no compulsion to follow a pattern at all!

So here is my quilt with the quilting in the border, using that template.

But what in the world are we going to do with all those extra blocks we had been making??? Easy! We packed up 48 of them in a bag that will go in my guild's August auction...

And then we packed up all the pre-cut paper foundation units, with the paper foundations, in two more packs, which will also go into our guild's auction. Bonus!!!

I was on a roll this month with quilting, so I also spent a couple of days quilting a quilt that a bee had made for my guild's auction. The quilt is one that the bee has made a few times already, so I was prepared to quilt it without having to put a lot of time into which design motifs I was going to use - I asked for them to put 4-inch wide sashing strips around the blocks, and add an 8-inch border. I love how this quilt looks! The blocks are oak leaf and reel blocks - with cherries used instead of the traditional red hoop around the center of the oak leaf stems. Here is the finished quilt... followed by some detail pictures.

When I'm making the meandering little feathered vine in the sashing strip, I start by making the stem, using a wavy template.

Next, I add feathers on one side of the vine...

And then on the other side of the vine.

Here's what the whole block looks like - with feathers added around the circles in the sashing cornerstones.

And here is a picture where you can get a better idea of how I quilted the border, and the corner.

So is that all that I've been doing? Well... you must know me by now. No, that's not all. That's all I've finished but I've been making a lot of progress on another quilt that is dear to my heart. I've been piecing these blocks for a long time now... they are made of thirty-six half-square triangles. Yes, I paper piece them, but not as individual half-square triangles. Instead, I piece strips of triangles... six of them... and then I stitch the strips together to form the block.

I realized there were a lot of ways to set these blocks. They could be set all facing the same direction, set touching or separated by sashing strips, set with the center triangles facing away or facing toward the center. I decided to set them with four blocks together, with the triangles all facing (long sides) away from the center.

Here is a set of four with half-inch sashing and a single half-inch cornerstone in the middle of a set of four.

Okay - so now that I've decided how I want the blocks set... what about the borders? How do you pull together all these blocks in a meaningful way with a border that compliments them? I started with another stack of big traingles for paper piecing...

And started cutting and stitching and experimenting and playing...

And then... I suddenly had enough blocks to make a border strip!

Here is what the border strip looks like, next to a set of the blocks. I like it!

And so here is the draft design of how I'm going to assemble the quilt top. This is only a draft... but it's getting close! It is so grand, in my eyes. I can't wait to finish it!

I've already started writing the pattern. Already, I'm going to have to modify it. Do you see the extra row of quarter-square triangles on the top and bottom of the quilt, inside of the pieced border? I've decided that making those quarter-square triangles is more work than I want to tackle (please - no comments from the peanut gallery about how I think these might be too much work, bearing in mind the amount of piecing in the rest of the quilt!!!!). I'm going to replace those strips with simple piano-key/slat strips.

Once I assemble this quilt, I'll quickly finish the pattern. Look for it in a couple months -- you may have noticed that I am accumulating a lot of "as soon as I finish this" tasks involving patterns and my website. They start adding up, and my time is still being usurped with a LOT of travel.
* * * * * *
Here are some more quilts to inspire you.
Christie Stevens sent me a picture of her Trip to Temecula quilt, based on my Postage Due pattern. She entered it in her guild's show in June -- the East Cobb Quilters' Guild hosts the largest quilt show in Georgia every other year, with over 350 quilts on display. Here is her quilt at the basting stage... with lots of quilting to be done! Those little on-point squares are each 1/2-inch in size. Whoa!

Here's a close-up of a block from her quilt (with the basting pins in it...). What a great job she did in piecing this quilt. It takes forever (or so it seems) but it's worth the effort and time.

Here's a finished block with the quilting completed.

And here is her finished quilt. Hooray for Christie! She named her quilt Trip to Temecula because the postage stamp design is sometimes called Trip Around the World, and because of her trip to Temecula, California (there is a great quilt shop there - and I get to go see it this month - I'm thrilled!). Christie got great news after entering this quilt in her guild's show: the judges awarded her quilt the NQA Award of Merit for Outstanding Achievement in Quiltmaking. Congratulations!

Debbie Williams created her masterpiece quilt after modifying my Ruffled Roses pattern. I love how she put flowers in each of the different baskets - and added wonderful cornerstones in the basket border as well as the outer pieced swag border. The photo suffers only from the fact the "holders" were not tall enough to hold it up as high as it needed to be - but the quilt suffers not at all from it; it's gorgeous! Debbie also used a gorgeous different center block in her version - it pulls it all together.

The quilt below (based on my Ladies of the Sea pattern) was made by Diane Johnston and machine-quilted by Cory Allender. It was entered in the HMQS show in Salt Lake City and received a third place award -- and Linda Taylor gave it her Judge's Choice award. Alright!!! I love the soft color of the background fabric that Diane chose to use -- and her work is wonderful.

Somehow I think I missed posting the photo below (and if I did post it earlier, it is worth posting again!). JoAnne MePherson made her own version of my Omigosh quilt and it has done quite a bit of traveling. It hung in a Honolulu Hawaii Quilt Guild show and the Peninsula Piecemakers Quilt Show in Poquoson, Virginia. In that latter show, it attracted the attention of a curator for a quilt display of pieces made by quilters in Virginia's Tidewater, so it hung last summer in the Virginia Quilt museum. Congrats, JoAnne! She is now working on her rendition of my Sarah's Revival - she likes a challenge, obviously!

Sheryl Phipps made the quilt below, after being inspired by my Stars for a New Day quilt. Sheryl has a good eye for color and I like how she finished off the quilt with a wide border and large cornerstone blocks.

Judy Welch sent me pictures of the Lake County Quilters Guild Raffle Quilt, which she was responsible for getting made. They named this quilt "Virginia Reel" in honor of Fanny Tod, the original creator of the antique quilt on which my Twirly Balls and Pinwheels (and their raffle quilt) is based. When Judy and her team (Judy Welch, Vanessa Hampton, Brenda Knox, and Sandy Earnest) made this quilt, they added a bit to the outer border to make the quilt larger and so that the pinwheel sashings floated in the quilt instead of meeting the edge of the quilt -- it's a nice touch. You may not be able to see it in the photo below, but they also put piping in the binding. This quilt is nothing short of spectacular! I also love how they also quilted this quilt with feathers in the white setting triangles.

Judy said their raffle ticket sellers (affectionately known as the Quilt Nannie-ettes) cannot wait to sell tickets for the guild. Judy digitized the design (with my permission) and made small quilts on her Bernina for her team. What a sweetheart.... and a work horse!

So now I have to ask one more time: is that all? Not quite.
Before I close, I thought I'd share that other than a few more guilds where I'm going to lecture and teach in the next few months, I'm also teaching at these two national seminars:
- Applique Away on Galveston Bay - February 21 to February 25, 2016 - http://www.appliqueawayongalvestonbay.com/ - I'll be teaching two 2-day classes. There will be plenty of opportunity to improve on your applique techniques in these workshops.
- Empty Spools Seminars - Sunday, April 10 to Friday, April 15, 2016 - http://www.appliqueawayongalvestonbay.com/ - I'll be teaching one applique class for five full days -- you'll get a total applique immersion experience in this workshop in a gorgeous setting on the California coast.
Until then, happy stitching!
Sue

(c)2015 Susan H. Garman


 Posts
Posts


