Saturday, March 30, 2013

Done is Good!

 
It is always good to finish a project -- a sense of completion warms my heart!  My Sarah's Revival quilt is finally finished -- the hand quilting extended across nine months -- if I hadn't had so many other fun projects to work on, it would have taken me about two months to hand quilt it.  But even though "done" is good... so is working on tons of different projects!  So here is Sarah... drum roll, please!


And here are some close-up views of Sarah; I love using two different quilting motifs in borders; in this case, I used both cross hatching (on the outer side of the vine) and slats (on the inner side of the vine).  I also felt like I needed to quilt something in those dogtooth borders, so I quilted a little 5/8-inch circle in each one.

 
Here's a view of the corner of Sarah; I loved making those cornerstone circles as well as the feather fan between the swags.

 
Here are the four center blocks.  My pattern says to use the same green fabric in each center block but who says you have to follow a pattern?  Even if it's my own!  I used four different green fabrics.  I like scrappy quilts - what else can I say?

 
I used a red and off-white toile fabric on the back of the quilt.  I love quilting with toile backings; they hide lots of things you don't want anyone to notice.

 
Someone asked, in the comments, what kind of thread I use for hand quilting.  I'm not too persnickety -- but I love YLI ( it comes on a nifty fat wooden spool), Gutermann, Coats and Clark's Coats Cotton (the kind that is a Glace Finished), and Mettler.  There are so many good choices -- and for the most part, I like them all as long as they are 100 percent cotton -- plus they have to be 40 weight, 3 ply threads so they can withstand any tugging and pulling.

I also got a LOT of emails asking me how I pre-shrink my battings.  First, let me say that I don't care if the manufacturer says its batting does not shrink or does not have to be pre-shrunk.  I have tested sixteen different battings and they ALL shrink -- cotton, cotton-poly blends, polyester (yes, it shrinks too!), things with scrim and things without scrim, wool, silk... and so on.  I don't like my quilts to look all puckered (unless they are utility quilts, in which case, I don't care); I like them to stay just like they are before being washed (not that I have ever had to wash my quilts... but once in a great, great while... you have to).  So on anything that is not a utility quilt, I preshrink the fabric AND the batting.  Here's how I shrink the batting.

1.  Take the batting out of the packaging.

 
2.  Unfold the whole thing so that the water can get into all of it, once it goes in the washer.

 
3.  Set the water temperature on hot.  Or warm if your washer heats the water up right away.  If I set mine on warm water, the last drop in the tub will finally be less than frigid... so I set it on HOT.

 
4.  Fill the wash tub with water.

 
5.  Shove the batting down in the water.  You can do this while the tub is still filling if you want to get a head start....

 
6.  The batting (no matter what kind) will want to rise to the top.  Find something that will not poke a hole in the batting and push the batting down under the water.  You can use your hand but it might get scalded if your water is as hot as mine.  I use a wooden spatula just because it's handy.  I'm sure there is something better but I like handy things.

 
7.  Once the batting is submerged, let it just s--o--a--k-- ... for about 15 minutes.  Do NOT let your washer advance to the point it starts agitating the batting.  For me, that just means I leave the top of my washer open/up.

 
8.  After the batting has soaked for a while, turn the dial to the SPIN cycle.  I don't care if it's high spin or low spin -- just whatever will spin the water out of the batting.  Let 'er spin!

 
9.  Once the spin cycle is complete....

 
10.  Take your batting and tuck it in the dryer.

 
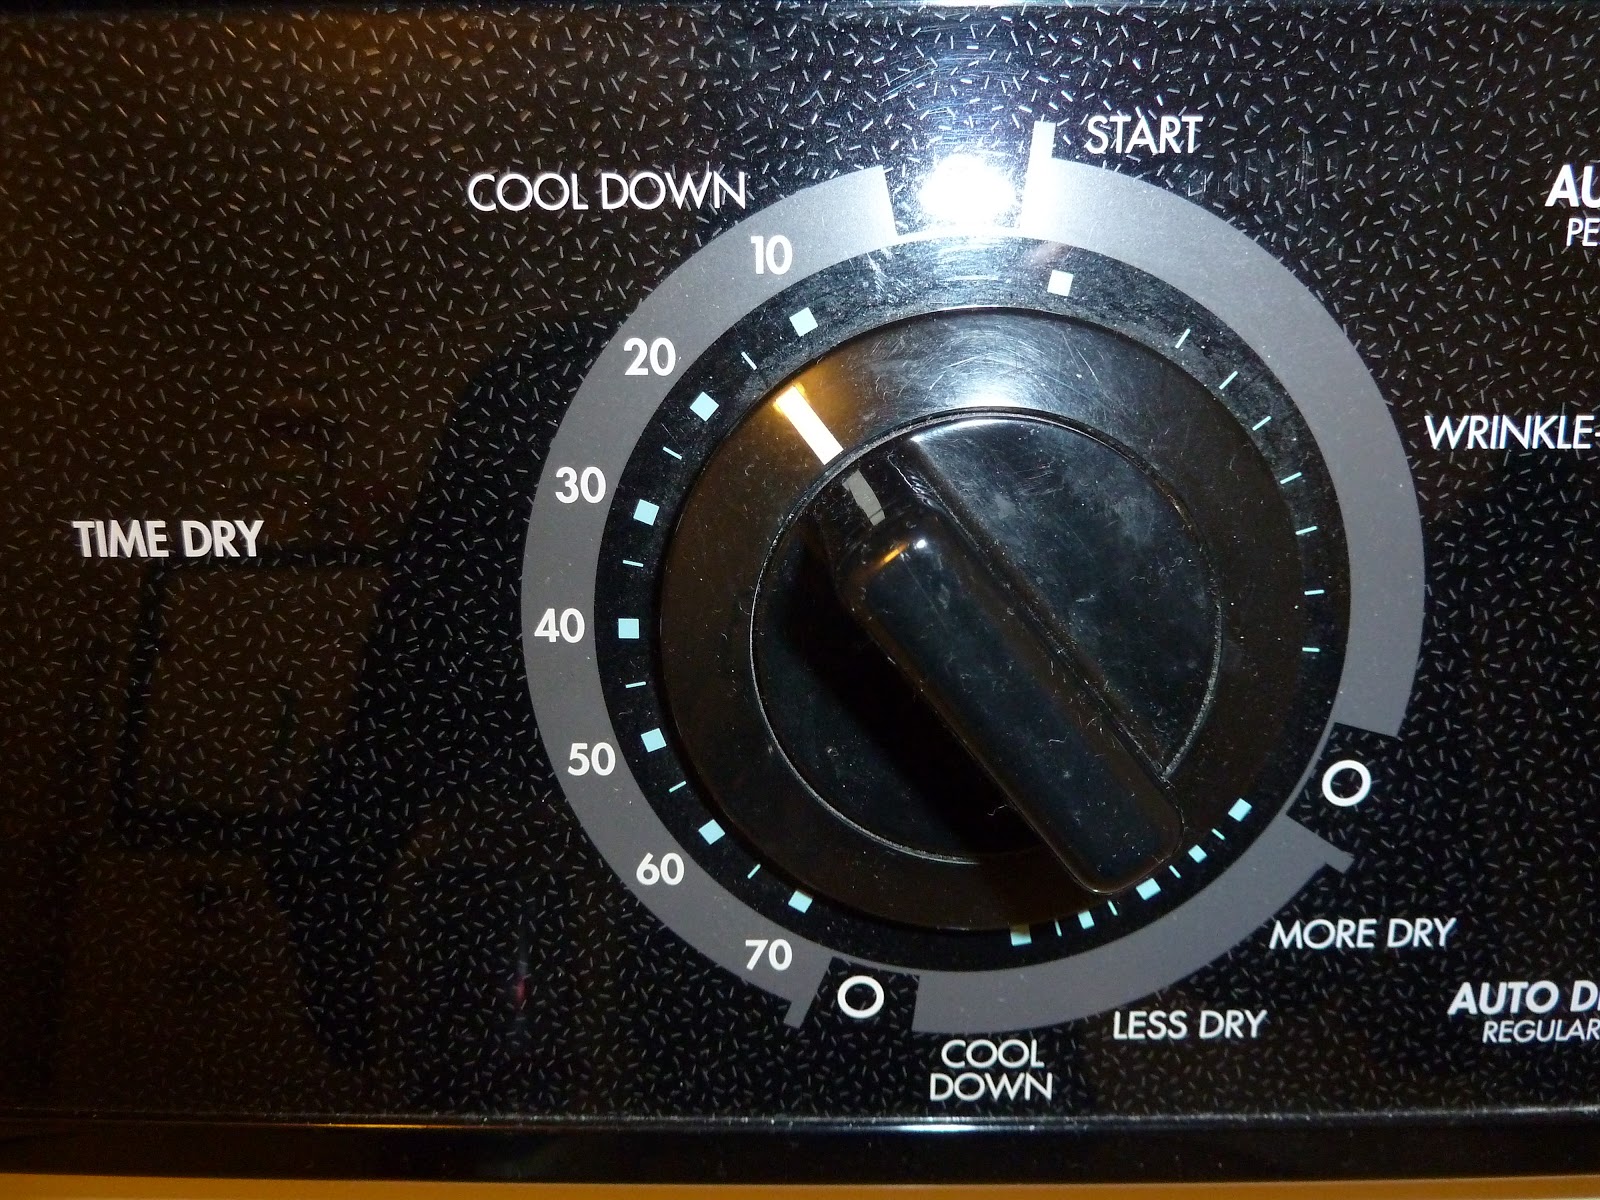
11.  I set the dial to time-dry for about 15 minutes.  I know it won't be dry in 15 minutes... but I'll go back and check it in a while and if it's still pretty wet, I'll set it for another 5-10 minutes.  I do that a few times until the batting is basically "nearly dry" -- which means not bone dry. 

 
12.  Take the batting out of the dryer -- mine is still a tad moist but not much.

 
13.  I then throw it on the floor in my entryway... you could also use a big bed or flip it across a shower rod or lay it across the back of a sofa... you get the picture... and I let it air dry the rest of the way.

 
14.  And then... magic!  It's ready to load on your machine or quilt frame, or ready to be basted so you can start quilting!  Here, you can see that I'm using this batting (100 percent wool) on my new quilt.  I'll show that quilt to you next... right after I show you one more thing about shrinking things.

 
I get asked a lot about how you (or even should you) wash fabric you get in kits.  My answer is YES, you should wash the fabric and here's how.  You can just stick it under the faucet with warm/hot water running and then let the fabric dry atop some towels.  Or you can dip it all in a sink full of warm/hot water and then let it dry on towels.  I don't recommend putting it loose in the washing machine, as you're likely to end up with a shredded, tangled mess.  Unless you have one of those nice zippered lingerie bags!  You can pick them up in stores like Bed, Bath, & Beyond.  Here, you can see I'm washing some scraps I got from my local quilt shop.  They will come out untangled and ready to press.


 And NOW... the big "reveal" is here!  I finished my Twirly Balls and Pinwheels quilt.  Well... you saw it last month, when I finished the top, but now you get to see the totally finished quilt!  Here's the first peek:  it's one of the blocks.  You can see that it is one of those spiral blocks -- known as Rising Sun, Wagon Wheel, Fly Wheel, Circle Saw, Wheel of Life, and Oklahoma Star.  I like my name:  Twirly Balls.  It's just a lot easier to remember.

 
Here is the quilt in my longarm machine -- I wanted to point out that I quilted around every single one of the 1,696 one-inch half-square triangles in this quilt!  I am a firm believer that quilts should be quilted on machines just like they would be quilted by hand... so I outline quilt around every pieced piece and appliqued piece... and then I go back and quilt some more in the open areas.

 
Here's a close-up view of me quilting around all the applique -- I use a straight edge ruler to do this and drag the machine with my right hand.  It is what works for me.

 
And here's a view of more blocks and pinwheel sashings... I just LOVED making this quilt - probably because I loved the cheddar in it - otherwise, I'm not sure I'd have been nearly as much in love with it.  Brown quilts aren't often my idea of pretty quilts... but add a little gold and cheddar, and I'm happy as a clam!

 
And finally, here is the finished Twirly Balls and Pinwheels.  I'm working on the pattern now -- writing patterns for block-of-the-month quilts can be tough... but this won't be a block of the month.  Well, not quite!  I'm writing a single pattern for the quilt.  If shops want to kit the quilt as a block of the month, I'm writing kitting instructions for that (i.e., customers would buy the pattern in Month 1 and get the fabric in monthly installments with a mini-list of instructions... or they could buy the pattern and all of the fabric... or they could buy the pattern and just use their stash).  This was a fun quilt -- hats off to Fanny Tod who inspired this quilt with her version, made in the mid-1800s; it can be seen in Quilts of Virginia - you'll recognize the quilt there, even though she used a different block, because she used those striking pinwheel sashings.  Thank you, Fanny!
 
I used a cheddar fabric on the back. I loved that fabric when I bought it, but I could never figure out how to make it work in any blocks.  I loved it so much that, fortunately, I bought enough for the backing! 

 
I was worried about what the back of the quilt would look like because the quilting in the black border was done with black thread. Would that look awful on the backing fabric? Actually... no!

 
I was also worried about getting this blog done on time... last week was the annual "Spring Retreat" on Galveston Island that I co-chair with a friend, and it ate up all my free time for a while.  At our retreat, we set up on Wednesday morning... and sew, sew, sew until we take everything down on Sunday.  I got tired of expensive retreats... who needs them?  So when Patty D and I planned this retreat, we made it simple:  1) no block exchanges, signature strip swaps, mystery quilts, community service quilts, demos, workshops, or stuff that takes us away from our own projects; 2) plenty of space and great lighting; 3) lodging is not included - to keep costs down, people can commute (20-25 miles), otherwise, they can stay onsite in the hotel or rent a beach house on the island; 4) meals are on your own - there are plenty of restaurants on the Island, some within walking distance, and there's an affordable bistro onsite; and 5) the best part of all:  it costs all of $45 for 4 days... and we give everyone a $20 gift card to our local quilt shops so it really only costs $25 for 4 days.  How sweet is that?  Have your guild retreats become expensive?  Think about simplifying them.  Sometimes I think we all tend to overthink and overplan events.  Simple is good!  The picture below was taken early in the morning before most of the quilters returned for the day.  We had space for 96 quilters -- such fun!
 
 
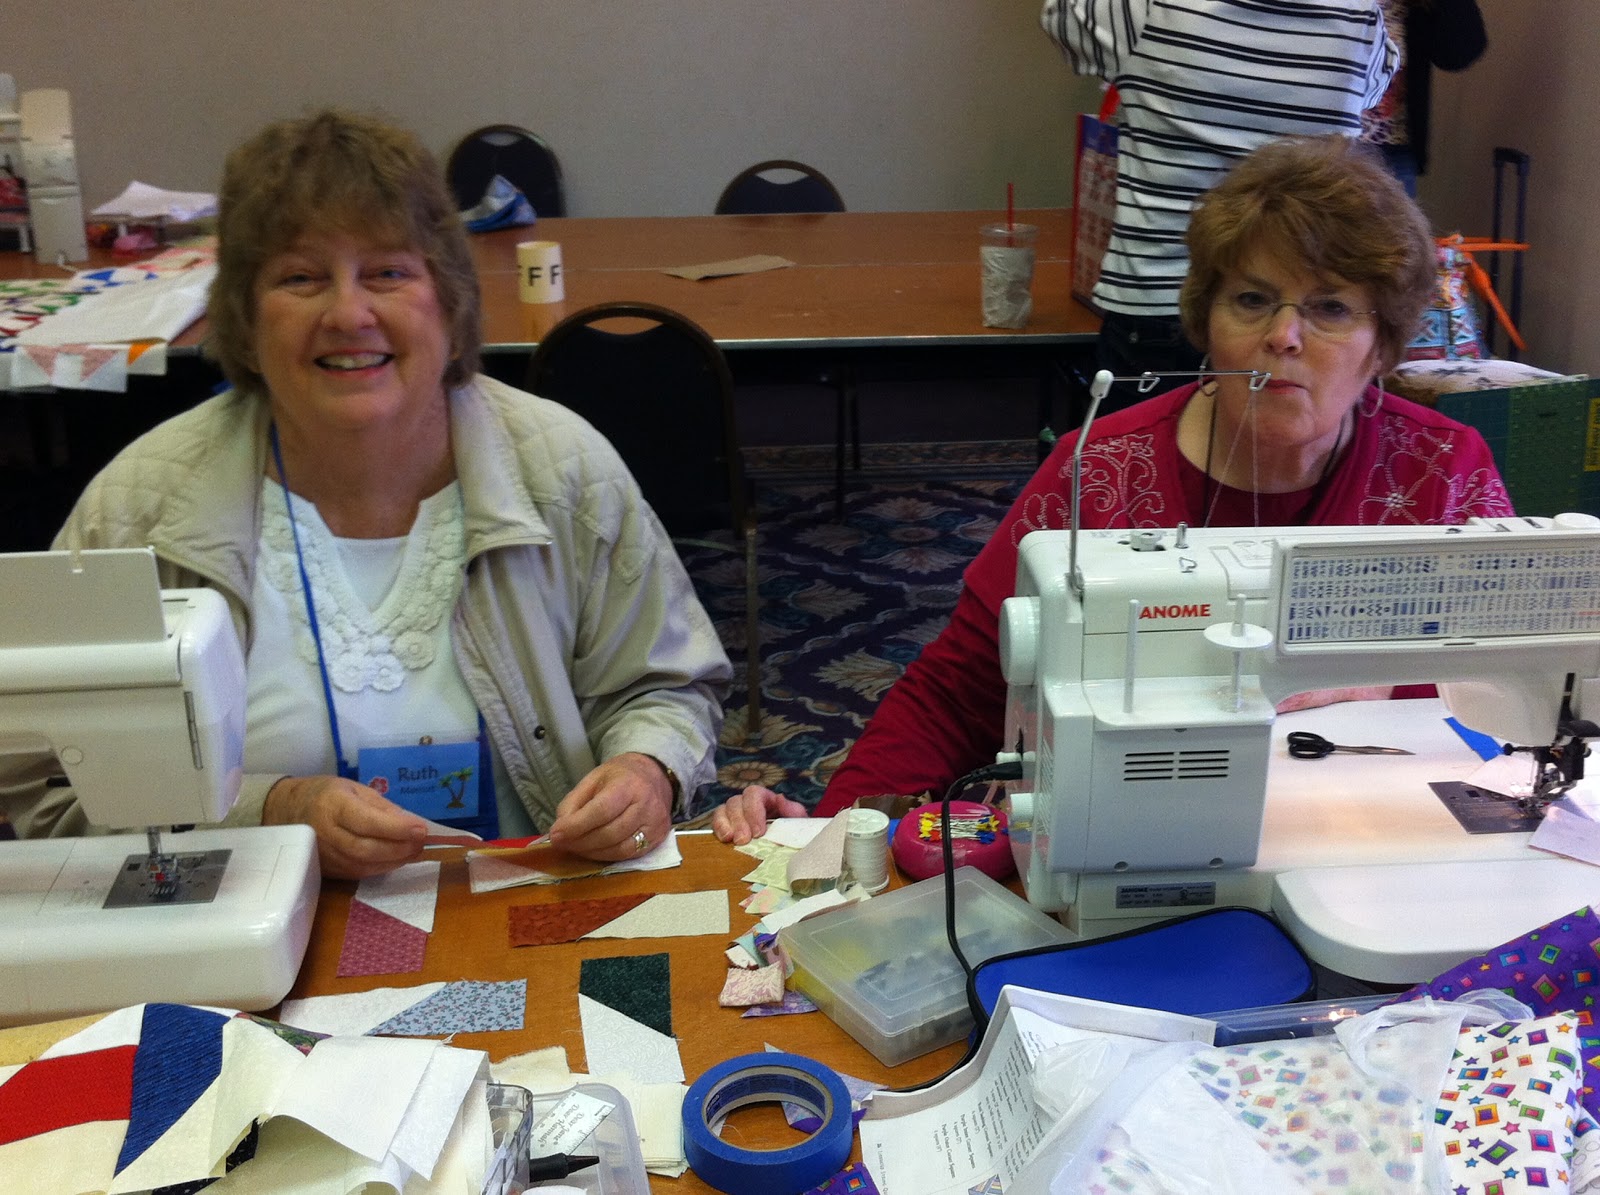
The best part about a retreat (other than working on projects, eating out, and not thinking about laundry) is being with friends.  Everyone had such fun - quilters can be such crazy ladies -- look at all the smiles!!!
 
 
Oh -- and the other best part about a retreat is seeing what everyone else is working on!  Here's my friend Jerrianne's Mary Mannakee block...  Jerrianne is an expert applique stitcher and I've always loved her fabric choices.

 
One of the gals at the retreat was working on my Friends of Baltimore blocks.  Dottie has a penchant for doing tons of embellishment.  I could learn a lot from her!  Here's one of her blocks (yes, I know it's sideways... Blogspot is not cooperating tonight!).  Look at the tendrils wrapping around the vine - and all of the stitching on the broderie perse flowers.  Bravo!

 
This flower (the yellow one below, on a different block) intrigued me -- it's ruched, but not like I've ever seen ruching done before.  Dottie - teach me!

 
And what did I work on?  Well... several things.  Let me back up a bit.  Last October, I spotted a delightful alphabet quilt in Mary Koval's booth at the Houston IQA quilt show.  I snapped a couple pictures (with permission, of course).  Here's the top half of the quilt...

 
Isn't it just too cute?  Below is the bottom half of the quilt.  The quilt is from a Nancy Page pattern published in the 1930s.

 
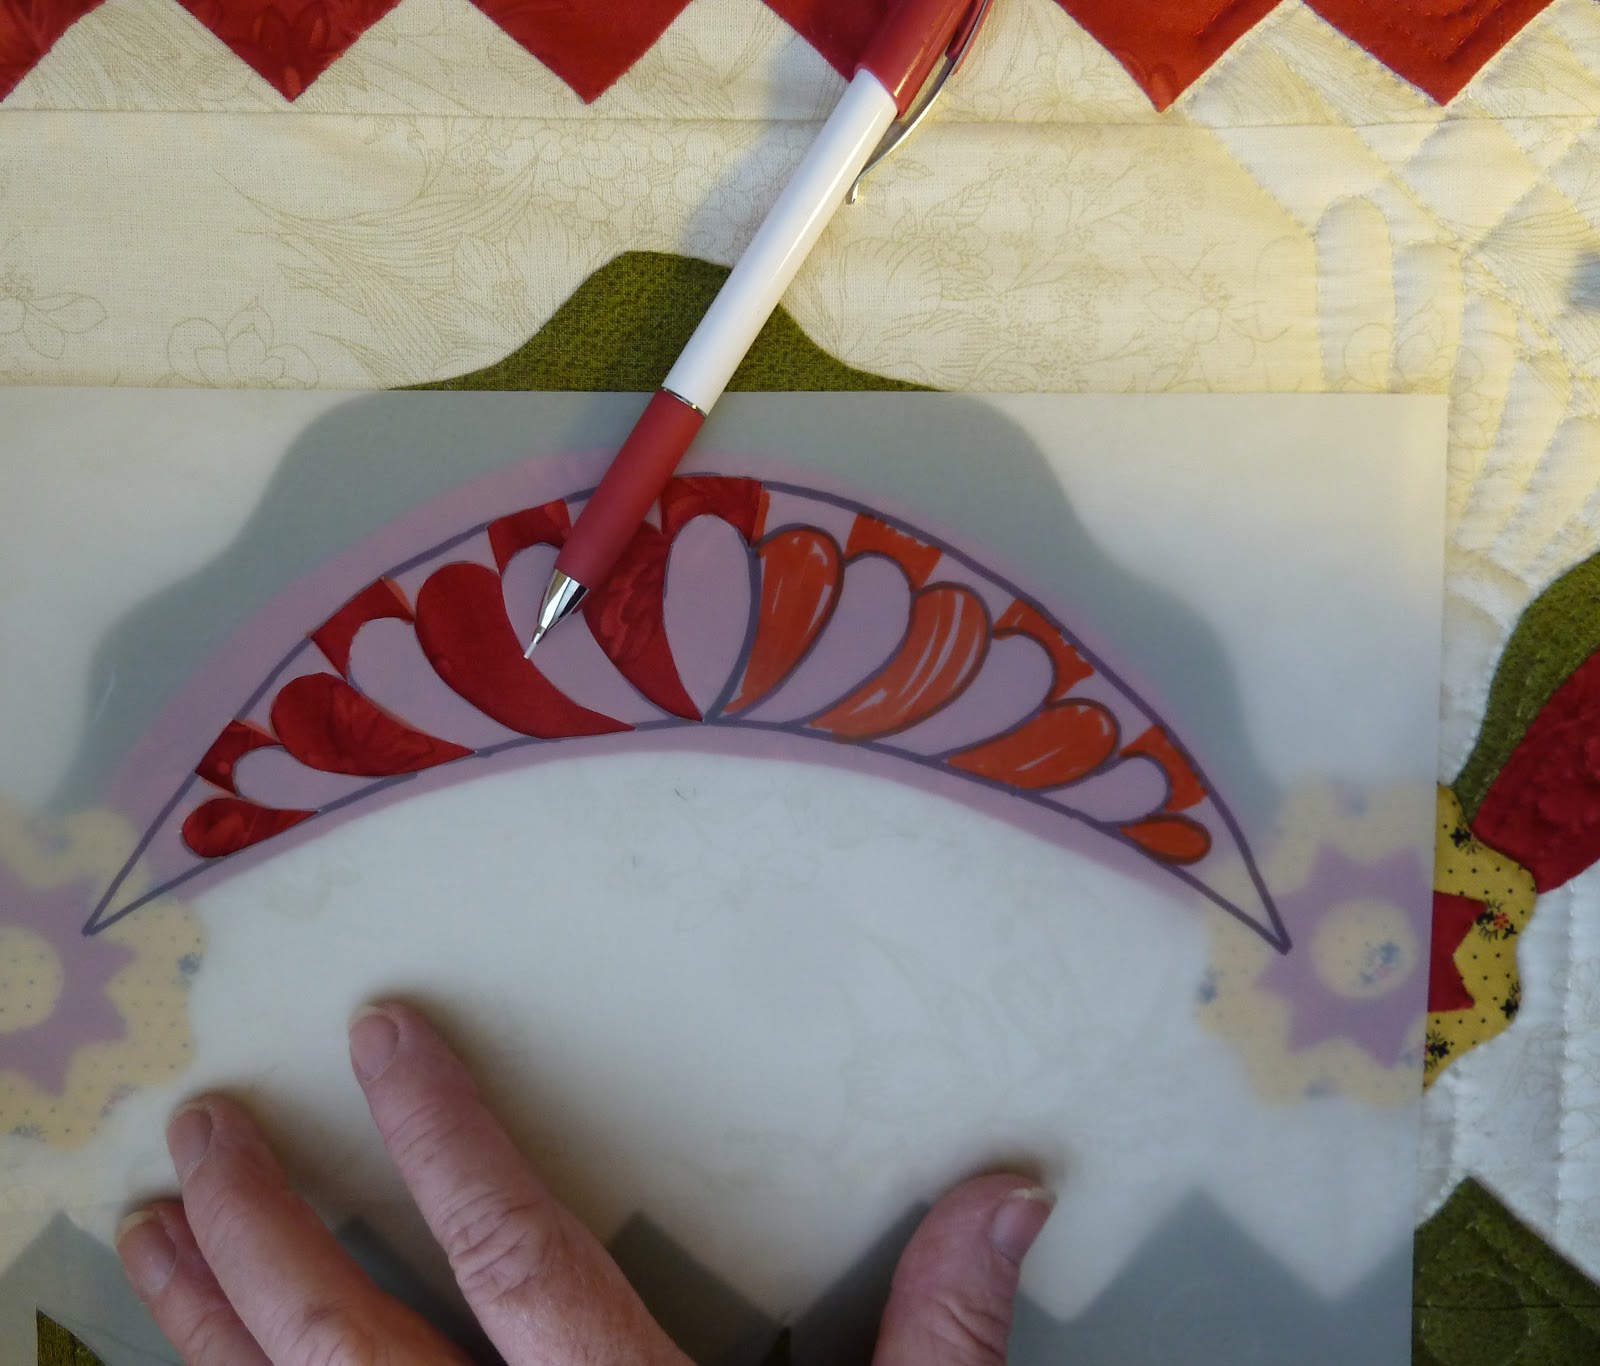
I liked that quilt so much that I came home and drew up my own blocks, based on Nancy's patterns (which are not copyrighted any more).  I started embroidering and appliqueing them at the retreat.  Here are the first six letters.

 
And here's the last three letters that I managed to finish... I still have six letters left.

 
They blocks will be cut down to 7 inches -- and sashed with wide sashing, as the original was done.  This is just such a sweet quilt!

I also worked on my new Baltimore blocks.  As a refresher, here's a mockup of the blocks...

 
One is in a straight set and one is on point.  Yes, I'm making two of each block.  Yes, I know I have issues... there's probably a syndrome named for it... but I don't care; I'm in denial and not looking for a cure any time soon!

 
I'd show you my progress on the blocks (they're both way past half way finished) but I'm going to save the "reveal" for later this year when some other pieces fall in place.  I have already designed two more blocks - I'm not sure you can see them as well because I didn't color them in yet.


I can't wait to start making these blocks; the one on the bottom just begs for a wonderful print reverse appliqued in the fluting of the vase - and I've got just the right one!

One of the things that happened at the retreat was that one of the gals brought a quilt with her that she had made in a workshop on precision piecing that I taught several years ago.  I've long believed that you do not learn to precision piece by making 12" blocks; you have to give yourself a challenge that MAKES you learn precision.  My workshop, therefore, involved making a quilt with 4-1/2 inch blocks that had half-inch squares in them.  Yes, I said half-inch squares.  It MAKES you sew with precision!!!  So... when a bunch of gals saw Becky's quilt, they asked me to teach the workshop at our guild's next sew-in.  Here's my quilt... it's been folded up for years, so it's pretty wrinkly, but you get the idea.  It's just shoo-fly blocks and double nine-patch blocks set within borders. 


So why am I telling you all this?  Because I'm starting to venture out and do lectures and workshops for guilds.  I had stopped doing them when family matters overrode life, but I've got more freedom now and I'll be offering workshops on precision piecing as well as applique and lots of other things!  Here's another project that I worked on at the retreat:  red and white twirly balls!  You might think I'd get tired of making these blocks but  I've actually already had a few request to teach them in workshops.  They're mind-bendingly FUN to make (and no, you don't have to make 1,696 one-inch half-square triangles for the sashing)!  Here's a draft design of red and white scrappy twirly balls set with three-strip sashing strips.  Sweet!  The workshop I'm putting together is for a smaller quilt with fewer twirly balls. 


That's all for this month -- it was a month of finishing things.  And now, I wish you all the most glorious Spring ever - full of retreats, fun projects, and things getting DONE!

Happy quilting -
Sue

(c)2013 Susan H. Garman

Friday, March 1, 2013

Revenge, Stars, Twirly Balls, Pinwheels, & Eagles...

 
Whew -- that's a long Subject title for this post, but at least you have a clue about what's coming below.  I've been having a lot of fun this past month - quilting in spare minutes here and there.  Let's take a look!
 
First of all, can you figure out what you're looking at below?  YES, IT'S THE LAST BORDER of Sarah's Revenge on my quilt frame.  Oops!  I heard so many people laughingly call it Sarah's Revenge that I sometimes forget and call it that too - when the real name of this quilt is Sarah's Revival - based on an antique quilt made by a woman whose name was Sarah.  What you're looking at below is the quilt on my Grace frame -- I love the frame because it eliminates basting.  Wheeeee!!!  It's not my knees that make me dislike basting any more... it's my back!  Bending over the quilt for 3 to 4 hours is a killer... until a three-pole quilting frame came home with me one day!
 
 
When I hand quilt, I like to keep a little tray table next to me.  Note that I have on it several things:  a cup to collect thread trimmings, a coaster for my Diet Coke, quilting thread spools, and little flashlights.  What are the flashlights for?  Because every once in a while, I lose a needle.  It flips off the quilt top or falls out of my hand, and I need to find it before my foot does.  I turn off the lights in the room, turn on the flash light, and the needle glints in the light when the flashlight eventually shines in its direction.  It's a handy tool, since I drop a needle at least once a day.  

 
Another tip... for hand or longarm quilters... is that I always pin a piece of fabric to the leaders (the wide canvas strips you attach your quilt top/back to).  I never seem to be able to remember from quilt to quilt which way the fabric is to be pinned:  right side up or up side down?  So this little fabric square keeps me flying straight when I'm loading a quilt on my frame or machine.

 
So how do I go about hand quilting?  It starts with an idea of what I want to do, but before I sit down, I always have a roll of painter's tape.  I use it as a cross-hatching guide.  You can see it on a quilt, behind the roll of tape in his picture:
 
 
But how do I make sure that my tape is at an exact 45-degree angle when I'm quilting?  I use a triangle ruler.  I place one edge of the ruler along a straight line (see the little arrows pointing down at the straight line I used).  Then I make sure my tape lines up (see the  l  o  n  g  arrow) with the diagonal of the triangle.  It never fails me!

 
I use the same method with vertical lines:  put one side of the triangle ruler along a straight line (the one you want your quilting lines to be perpendicular to -- indicated by the little arrows pointing up), and make sure that your tape (which is NOT in the picture below) lines up with the vertical line (by the long arrow I've marked).  This method never fails me either.  Yet, at least!

 
I use this same method when quilting cross-hatching across the blocks in this quilt -- it works!


But what about quilting little feathers on my ruffled swags?  How did I do that in a uniform way?  I had to give that some thought before I started quilting this quilt, as there was no template in my box of quilting templates that would fit this swag. 


Using a piece of Templar and a Sharpie marker, I drew the outline what I wanted to quilt and then marked the lines that I wanted to quilt within that area.  Next, I cut out every other feather... and on the odd feathers, I cut out the area that ran into the other side of the "smile" shape.  It took a lot of care to cut smoothly and not too deeply, but it worked.  Check it out, below -- it's my own "home-made" quilting template.  Note that only HALF of the template design has been cut out -- I just reversed the template when I quilted the other side of the ruffled swag.
 
 
So here is the template, laid on top of the swag and ready to quilt.  And here is my ever-present white-lead ceramic pencil for marking the template lines onto my fabric.  If you use the pencil, use it with a light hand - it rubs off pretty easily (or you can use a Mars Plastic Staedtler eraser from your office supply store) if your quilting doesn't quite wipe it out.

 
In the picture below, you can see that I've quilted the feathers.  I remove the template to do the hand-quilting -- I am just showing it here so that you can see how it laid on top of the swag for marking it.


For the area between the swags, I decided that I didn't want to "just" do cross-hatching, so I took a border quilting template and used only a piece of the design...
 
 
Because this design is on an off-white background fabric, my white-lead ceramic pencil would not show up well.  I use a cheap Papermate mechanical pencil to GENTLY mark the quilt design.  By the time I quilt across the line, it becomes invisible.  IF I have marked the line too heavily, I erase it til it is barely visible before I start quilting -- it's too difficult to remove pencil lines after quilting, otherwise.  Can you see the line below?  It's there!  Note that I've only done one half of the cross-hatching on this part of the quilt...  the other cross-hatch lines will be added soon.

 
And here is the finished quilted border.  I love how it turned out!


Here's the cornerstone of that border.  You may note that I've got little circles quilted in each of the dogtooth sections of the inner and outer border strip.  How did I do those?  I started off by using those adhesive circles you can buy at the office supply store and quilting around them, but the circles just didn't adhere to the quilt top well enough.  
 
 
I pulled out my very FAVORITE circle template...  I like it because it is thick plastic.  It doesn't bend and it has a beveled edge for inking without bleeding.  Sweet!

 
I used the template by putting it on the quilt and marking the circle with the ceramic pencil.  It makes it very easy to mark and then quilt circles.

 
And here is the final Sarah's Revival quilt.  I think it's one of my favorite quilts because it's so bright and cheery!  Many thanks go to the original quiltmaker, Sarah, of course.

 
I'm always working on multiple projects during the month.  You don't get to see them all - only those where I make progress, usually.  Below is a quilt made by my friend Jerrianne's hairdresser's stepmother (did you follow that?!).  This woman made dozens of quilts, all completely hand pieced, but never did finish them.  The hairdresser gave a dozen or more to Jerrianne, and she has been feeding some to me to quilt for our guild's annual auction.  The quilt block in this quilt was unusual - it was not one that Jerrianne or I had seen before.  After much thought, I quilted the top with a simple Baptist fan (or "dinner plate") quilt pattern.  It is a quilting pattern used often in the past.

 
Jerrianne and I, along with lots of other bee members, did a lot of guessing about this block pattern, though.  Some thought it to be a flower pot or a flower basket of some sort.  Others thought it was a wonky star or a crown.  I think it looks like a rising star.  Who knows?


I even looked in Barbara Brackman's Encyclopedia of Pieced Block Patterns... no luck there, either.  The origins of this block remain a mystery... I suspect that it is just a unique creation!
 
 
I have another one of my friend Jerrianne's hairdresser's stepmother's quilt tops for my guild's auction... it's a unique Trip Around the World quilt top.  Hopefully I'll have it quilted by next month and you can peek at it then.  In the meantime, remember this block?  I bought a set of them on eBay and they inspired my Happy Daze quilt, shown in a previous post.  They did more than that, though.  
 
 
They inspired yet another set of "twirly ball" blocks, which I did in browns, golds, and cheddars.  But in this set of blocks, I reversed those "spikes" on the outside and had them point inward instead of outward.


I knew I wanted to set these blocks on point, with sashing strips made of 2" pinwheels.  To do that, I cut hundreds of triangles.  I stacked and stored them in cookie sheets like this:

 
Then I made paper foundations for strips of pinwheels -- and made those strips in two pieces-- a left and a right side.  I laid out four triangles for each pinwheel, along with the background fabric, and started sewing.

 
For each pinwheel strip, I had to do two single strips -- one for the right side of the pinwheel and one for the left side of the pinwheel.  Then I had to sew the halves together.  Knowing that, I wanted each half-square triangle to face its "partner," such that the seam allowances would "kiss" and butt up against each other, instead of on top of each other.  To do that, I had to sew one long strip from the "top" of the strip and one long strip from the "bottom" of the strip. 


It works! Here is a sewn pinwheel sashing strip and you can see the seam allowances kiss quite nicely!
 
 
And here is the pinwheel strip, sewn together.  Note that in this picture, I've cropped off the seam allowances in the photo - if I didn't do that, these pinwheels would look really wonky in the photo. 

 
When I sewed the two strips together, I also pressed the seam allowances open. It wasn't easy -- but it was important because if I didn't do that, it would be quite difficult to get the foot of a longarm machine across that "hump" in the middle.  I believe that you should always think ahead about how you will quilt everything when you are done.  Note that when I sew the strips together, I do a LOT of pinning to keep those seam intersections meeting precisely where they are supposed to meet.  Patience pays off.  The other thing I do after pinning and pressing is that I place one of my long rulers on top of the pressed strip while it is still freshly pressed and warm.  This keeps that seam from relaxing quite so quickly (thanks go to Sally Collins for that tip!).

 
So what did I do, once I had all those pinwheel strips sewn and pressed, along with a few more extraneous pinwheels?

 
I laid them out on the floor with my twirly ball blocks, of course!  Take a look...

 
But it wasn't until I put the setting triangles in place around the border that the quilt came "alive" for me!

 
The quilt needed to be sewn together in diagonal strips.  That meant that I had to take "half twirly ball blocks" and pair them with a setting triangle.  Math isn't particularly difficult for me... but cutting triangles the right size for what is the equivalent of a 12" half-square triangle is daunting to me -- it's just WAY TOO EASY to screw it up and cut that diagonal seam allowance or the outer edges too big or too small.  Now, bear in mind... the BLACK triangle IS the right size because I knew the finished block size was going to be 12 inches... and to make a setting triangle for a 12 inch block, I know you just quarter an 18-1/4 inch square.  That's easy enough... so how did I put these together and have the whole block come out to be 12 inches square (finished size)?

 
First, I trimmed the diagonal edge of the appliqued triangle block... that was easy because I knew where the center of the block was, and I knew that the seam line would go through the "dip" in the dogtooth spikes in the outer circle of the applique.  I just lined my ruler up, adding the quarter-inch seam allowance, and cut it.  Next, I folded the black triangle in half to find the center of the long side. 


I placed that center fold on top of the center of the appliqued triangle -- I knew where the center was on that triangle because there is a circle on the center of that triangle. 


Next, I pinned the two triangles together, using plenty of pins because I was sewing a bias edge to a straight-of-grain edge...

 
And I stitched it very carefully, not letting it drag or be pulled... and removing pins as I stitched...


 And after I stitched the seam line, I pressed the triangles open.

 
 Here is where a 12-1/2 inch ruler comes in really handy!

 
I put the ruler down on top of the CORRECTLY SIZED black triangle... and trimmed the excess fabric off of the appliqued triangle.  Voile!!!  Simple as pie!

 
And I had a perfectly sized block, ready to stitch in place!

 
I'll spare you the details... but here is the finished quilt top.  Sorry it's not the greatest picture -- I take photos in my entry way because it's big and flat... and the weather was not cooperating and providing good light!  I'm going to be quilting this quilt in the coming month, so I'm sure you'll see more of Twirly Balls and Pinwheels!  This quilt design will eventually be offered as a single pattern -- or shops can kit it as a 6-month block-of-the-month quilt.  I should mention for those of you who have the Quilts of Virginia book, that the idea of using pinwheel sashing strips that drifted out into the border came from a quilt made by Fanny Tod in the 1800s.  Ever since I saw that design, I've wanted to make a quilt with pinwheel sashing strips - and finally, I did it!
 
 
In the meantime, between other projects, I've been preparing some blocks for workshops that I plan to teach.  That means... I have to design a new quilt!  I have, after much thought, decided to do a teeny bit of lectures/workshops in the future.  I have been on over a three-year hiatus due to family matters that took priority.  So... you might see me out and about some time in the future!  I'll be offering workshops on simple-to-make, pain-free wonderful feathered stars, lovely papercut applique blocks, and some elegant new Baltimore blocks, along with some other fun options.  Here is one of the Baltimore blocks - a glorious eagle. 

 
Here is a colorized version of the block -- I haven't decided if I want to make the eagle brown (its true color) or blue (it is such a rich color!).  Both options were used in the heyday of Baltimore quilts over a century ago.  I'll just have to audition fabrics to decide.

 
BUT...  I really want to do a Baltimore album quilt with all of the blocks set on point.  So... not one to take the easy path... I'm designing blocks that, with only slight alterations, can be used in either straight sets or on-point sets.  How cool is that?  Well... I think it's pretty cool!  Except that I will have to make two blocks, since I need to have samples of blocks done both ways.  That's okay - if I didn't love these designs, it might be a problem, but I LOVE these blocks!  Here's the on-point eagle.

 
And here it is, "colorized."  Isn't it awesome?  Sorry if I sound like I'm stuck on my own designs, but I'm just really excited about doing these blocks!  They will all be 15 inches, finished size.


Okay, I'm not quite finished yet...  Several people had questions in the Comments I received.  Here are some answers:
  • Do I draw my patterns by hand or computer?  I draw them out full-size by hand... then scan them and do a lot of clean-up work in Adobe Photoshop Creative Suite.
  • Do I use an overlay for applique?  Only when I have to - like when I'm making a complex Baltimore applique block and a light box isn't strong enough to penetrate multiple layers of fabric.  Overlays are great, though - I like to use them when light boxes won't suffice.
  • How do I avoid bleeding (when/if I block a quilt)?  I try to prevent bleeding by pre-washing all fabric, and by avoiding chemicals which come in the form of starch, Best Press, fabric finish, washout markers, disappearing ink markers, frixion pens, or anything similar.  The only thing I use on my quilts contain inert ingredients like plain old pencils, ceramic pencils, or white chalk.  I try to avoid, also, being in a position where I need to block a quilt:  I hand quilt in square frames and on the longarm, I make sure that my backing fabric is squared up (not shaped like a trapezoid). 
  • There were some other comments to talk about buying and putting fabric together, and piecing and hand-quilting tips.  I'll answer those in another blog post, as I think my answers need some thought and pictures. 
NOW I'm done... just in time to say that I really, really DID meet my deadline (Central Time, anyway) of posting on or by the first of the month.  It's only 11:15 pm here... so I DID it!  Until next month...
 
Happy quilting!
 
Sue
(c) 2013 Susan H. Garman